Let’s start our journey of exploring MeeGo. In this multipart tutorial, we will gradually inhabit this new ecosystem and master the tricks and tips for programming day-to-day needs and ground breaking applications.
In this first part, we will setup a MeeGo box for our experimentation and learning purpose. Gone are the days when “Hello, World!” was the first thing you attempted on an alluring technology. Using a new platform requires careful planning for installation, steps for configuration, and scripts and utilities for starting and executing it. Equally important is that you should be able to do this without disturbing your production machines.
Step 1: Create a virtual machine
Before you seriously consider a new product, try it well on a virtual machine. This saves you time, effort and any problems that might be caused by installing anything new.
As of now, MeeGo is supported only on Linux. If you have a Linux box or Linux virtual machine already setup, please jump to “Step 3: Installing MeeGo”. If you are precautious like me, use the following steps to configure a virtual environment for installing MeeGo.
There are quite a few different classes of virtualization software in the market, for experimentation purpose I like “Virtual Box” from Sun (now from Oracle) – it is free and supports multiple operating systems. You can download it from http://www.virtualbox.org/.
Follow these steps to quickly configure your new virtual machine:
1. Start the Virtual Box software
2. Select Machine > New Machine. This starts new virtual machine wizard.

3. Give your virtual machine a name and select the operating system and its version
4. Select the amount of RAM. For now you can keep it to 1024MB, if required you can increase it later.
5. Specify hard disk to be used for booting. For a new OS it is recommended that you create a new virtual hard disk. Selecting the option to create a new hard disk will start another wizard. I have created a 40GB virtual hard-disk on one for my portable disk. You get an option to create a “Dynamically expanding storage” or “Fixed-size storage”. For starters, and especially when you have not calculated the amount of space required, use the former.
This completes the creation of a virtual machine.
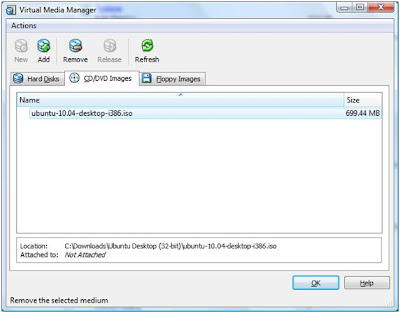
Before you move to the next step you must have Linux CD/DVD. If you have downloaded an ISO, you can add it to Virtual Box’s Media Manager. This allows you to mount the ISOs without burning the image on a CD/DVD. To do this, Select File > Virtual Media Manager

In the screen that opens next, select the “CD/DVD images” tab and click “Add”. Now, simply select the ISO file.

When you start you virtual machine by clicking on “Start”, a first time load mechanism in Virtual Box gives you an option to choose the installation disk. Select the ISO when prompted to do so.
Step 2: Installing Linux
Insert Ubuntu CD (or select the installation disk, if using Virtual Box) and boot the machine. Select your language preference and click “Install Ubuntu”. Now follow the wizard and enter the required information.

When asked where you want to install Ubuntu, make sure that you select the virtual hard drive created earlier (otherwise you will override another disk partition or virtual drive, risking your data)

Installation of Ubuntu will start, meanwhile locate the nearest coffee machine and get a cup of coffee. If you have it right on your desk, pretend to be away for some time. If nothing else, just watch the slides the installer takes you through (the slides are quite informative)

Once the installation is completed, Ubuntu will start.
Step 3: Installing MeeGo SDK
To install MeeGo SDK follow these steps:
1. Download the MeeGo SDK from
http://download3.meego.com/meego-sdk-0524.tar.bz2
2. Extract it by running the following command as root:
sudo tar jxvf meego-sdk-0524.tar.bz2
3. Download the MeeGo SDK chroot script from
http://download3.meego.com/meego-sdk-chroot
chroot is used to change the disk root directory. Commands executed within the new root directory will not be able to access anything outside the new root directory. All the processes (and their child processes) executed within the new root directory will take the new root directory as the root directory. This enables running a new system within an existing Linux box. You use chroot for creating your new environment, testing it and ensuring that you use only those files, libraries and applications that you have explicitly created or copied into the new root directory.
4. MeeGo SDK chroot script (meego-sdk-chroot) configures MeeGo chroot environment. Make the script executable, move it to /usr/bin so that you can execute it and access it without complete path
chmod +x meego-sdk-chroot
mv meego-sdk-chroot /usr/bin
Step 4: Starting MeeGo
To successfully start a MeeGo simulator, follow these steps:
1. For the X server to display MeeGo screen, run this command:
xhost +local:
2. Now run the MeeFo chroot script
sudo meego-sdk-chroot /locationOfExtractedMeeGo
You have now entered the MeeGo root environment
3. Set the DISPLAY environment variable to 0
export DISPLAY=:0
4. Start MeeGo simulator
startmeego &

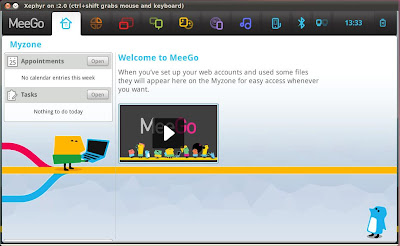
It's now time to have fun with the new desktop, once you are done, type “exit” in the terminal window from where you started the MeeGo simulator.
In the next part, we will write a "Hello, World!" application.


